Halloween is the perfect time to bring out colorful paper, glue, scissors, and your children’s imagination. However, keeping little ones entertained during the spooky season can become challenging, especially when you want activities that are affordable, simple, and suitable for different ages.
That is where Halloween Paper Crafts Kids can enjoy making at home become a wonderful solution. From friendly paper ghosts to spooky bats and colorful pumpkins, these crafts turn everyday supplies into exciting Halloween decorations. You do not need expensive kits or complicated instructions to create memorable moments with your children.
Imagine spending a cozy afternoon making paper spiders while your little ones giggle at their silly expressions. Older children can experiment with folding, cutting, and decorating, while younger kids enjoy coloring and sticking prepared shapes.
If your family loves creative projects, explore 41 Paper Crafts Kids Never Get Bored Of for even more inspiration beyond Halloween. You can also discover 15 Easy Halloween Crafts for Kids That Are More Fun for additional seasonal activities that bring everyone together.
The best part about these Halloween projects is their flexibility. You can adapt each craft to your child’s age, available materials, and attention span. Simple designs are perfect for preschoolers, while older children can create elaborate haunted houses, paper lanterns, and spooky garlands.
Many projects also encourage creativity, patience, and fine motor skills without making craft time feel like a lesson. In this guide, you will discover 27 Halloween Paper Crafts Kids can make at home using accessible materials and easy techniques. Get your supplies ready, clear a little workspace, and prepare for a spooky crafting adventure filled with laughter, creativity, and decorations your children will proudly display.
27 Halloween Paper Crafts Kids Can Make at Home
1. Paper Plate Ghosts
Paper plate ghosts are a fantastic starting point for children who love spooky decorations without scary faces. This craft uses inexpensive materials and gives little hands plenty of opportunities to practice cutting, gluing, and decorating.
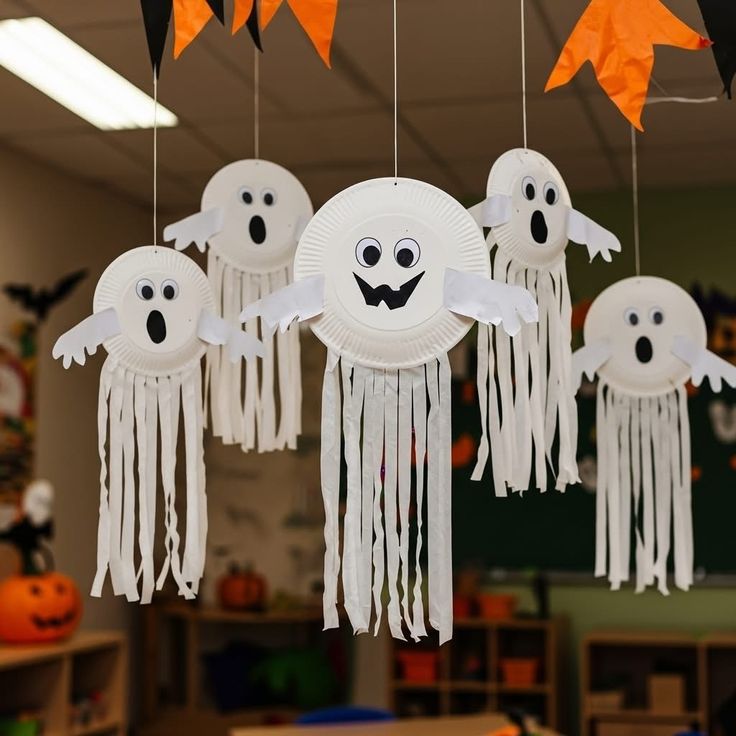
You will need white paper plates, black construction paper, glue, scissors, and white tissue paper or crepe paper. Begin by cutting ghost eyes and a mouth from the black paper. Younger children can use pre-cut shapes to make the activity easier and safer.
Help your child attach the facial features to the plate, then add strips of tissue paper underneath to create a floating ghost effect. You can hang the finished ghosts on bedroom doors, windows, or a Halloween party wall.
For more inspiration, explore 25 Halloween Decorating Ideas for Families Who Want a Cozy, Not Scary Home and turn your children’s creations into festive decorations. Let each child choose a different expression to give every ghost its own personality.
2. Paper Bat Decorations
Paper bats are easy to make and look wonderful hanging across a doorway or bedroom wall. Gather black construction paper, pencils, scissors, and glue. Fold a sheet of paper in half and draw half a bat shape along the folded edge.
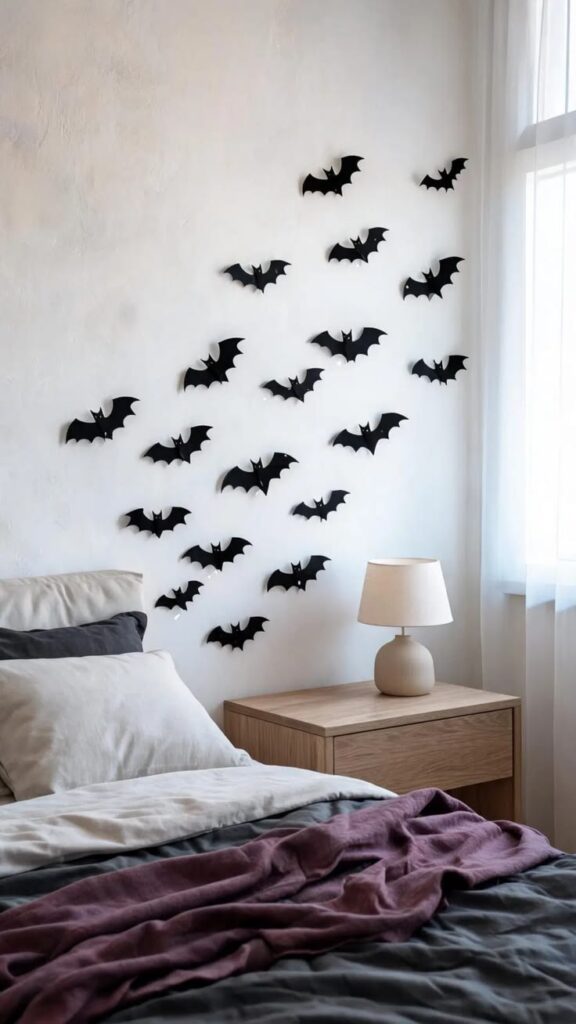
Cut along the outline, then unfold the paper to reveal a symmetrical bat. Older children can experiment with different wing shapes, while younger children can decorate bat templates prepared by an adult.
Add googly eyes or small paper eyes, then draw a cheerful or mischievous mouth. Attach string to the top if you want to hang the bats from a safe, suitable display area. You can make several bats in different sizes to create a lively Halloween scene.
For another creative activity, check out 27 Easy Toilet Paper Roll Crafts for Kids They’ll Actually Love for projects that reuse everyday materials. Encourage your children to create a whole family of bats with different expressions and wing designs.
3. Paper Pumpkin Faces
Paper pumpkins are perfect for children who enjoy experimenting with facial expressions and colors. You will need orange construction paper, green paper, black paper, glue, and child-safe scissors. Cut out a large pumpkin shape, then add a green stem at the top.
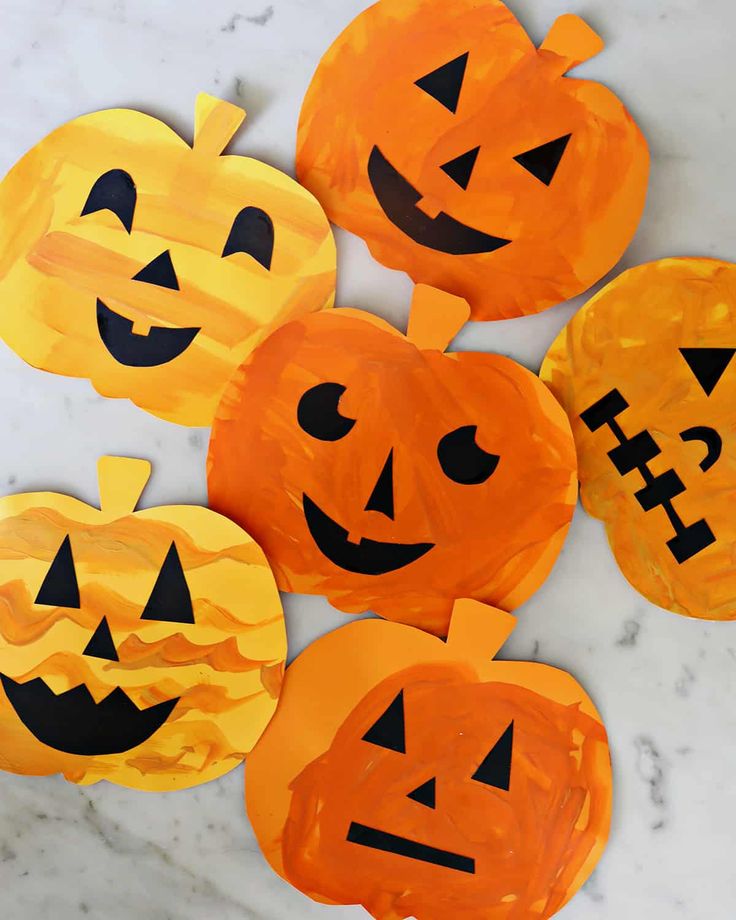
Help your child cut triangles, circles, and curved shapes from black paper for the eyes, nose, and mouth. Alternatively, let younger children draw the features with washable markers.
Encourage everyone to create a different pumpkin personality. One pumpkin might look surprised, another might have a silly smile, and another could have sleepy eyes. Display the finished pumpkins on a wall, classroom board, or refrigerator using suitable materials.
You can also pair this project with 21 Pumpkin Decorating Party Ideas Kids and Adults Will Both Love for a fun seasonal crafting afternoon. Keep the activity relaxed and let children make creative choices rather than worrying about perfectly shaped pumpkins.
4. Folded Paper Witch Hats
Witch hats are a classic Halloween symbol, and paper versions make charming decorations for children to create. Gather black construction paper, colored paper scraps, glue, and scissors.
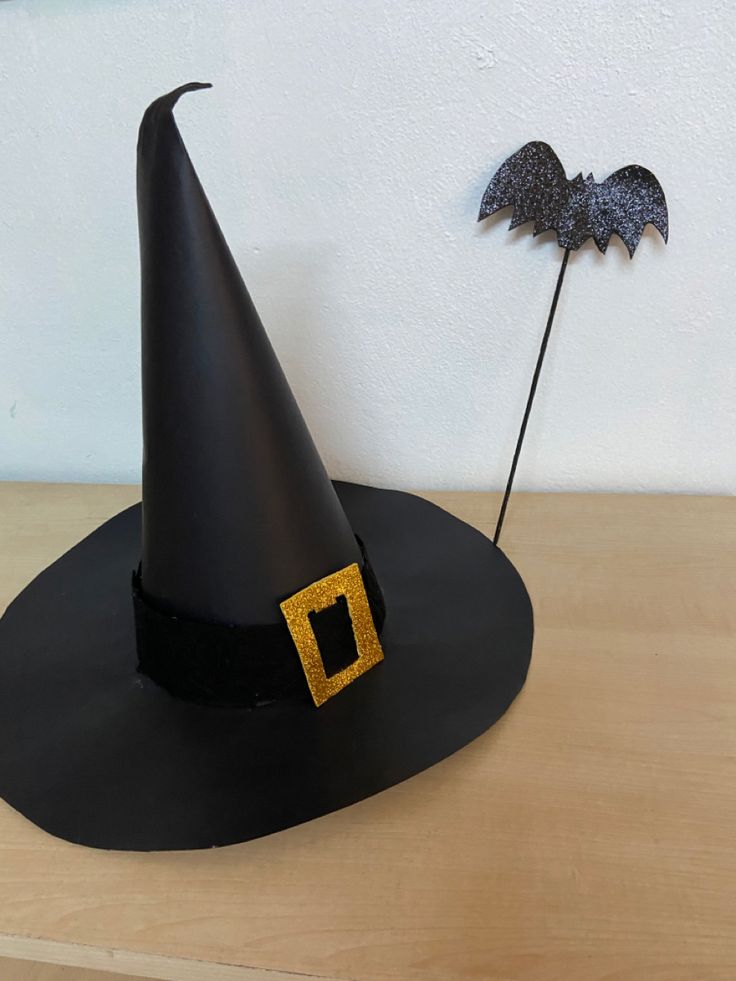
Draw a large triangle for the hat and a wide oval or curved brim. Cut out both shapes, then glue the triangle onto the brim. Add a purple or orange paper band, colorful stars, or small paper buckles to personalize each design.
Older children can decorate their hats with moons, tiny bats, and glitter-free paper embellishments. Younger children may prefer large stickers or simple shapes that are easy to handle. Once finished, attach the hats to greeting cards, paper characters, or a Halloween display.
If your family enjoys making decorations together, explore 21 Easy Crafts Kids Can Make at Home for more simple projects. Let each child invent a witch character and design a hat that matches its personality.
5. Paper Haunted Houses
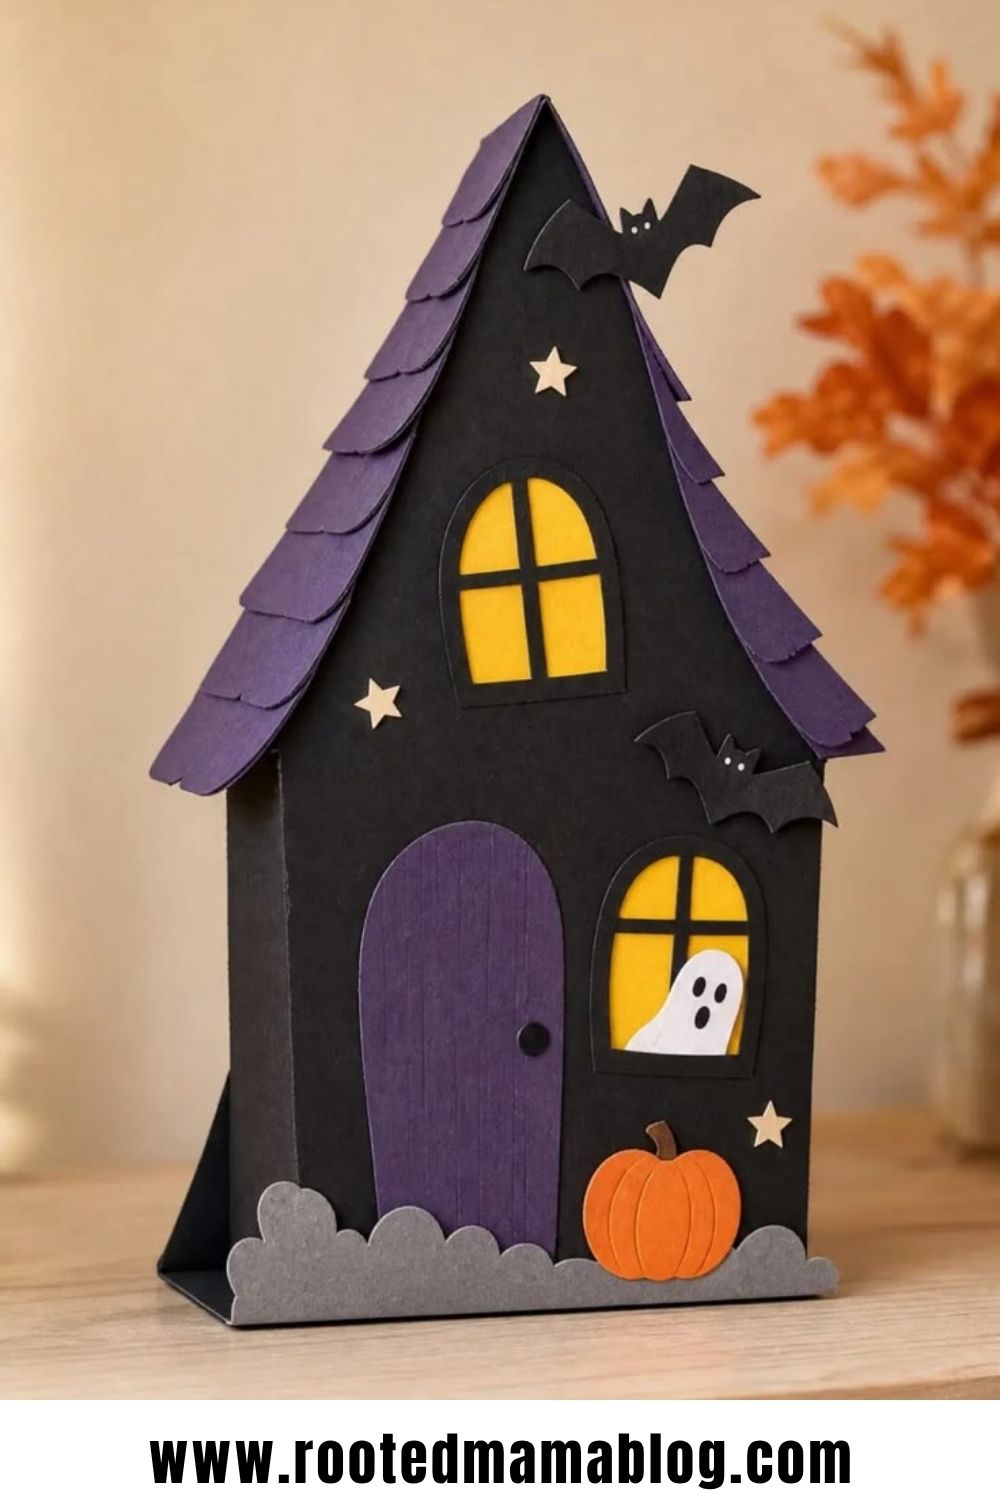
A paper haunted house gives children the freedom to build their own spooky little world. You will need black, purple, orange, and yellow construction paper, along with glue, scissors, and markers.

Start with a large sheet of black paper as the background. Cut out a house shape, then add windows, a door, a roof, and crooked chimneys using contrasting paper colors. Yellow windows can make the house appear illuminated against the dark background.
Invite your child to add paper ghosts, bats, pumpkins, or a winding path leading to the front door. Older children can design multiple rooms or create a nighttime landscape with a paper moon. Display the finished artwork as part of your seasonal decorations.
For more imaginative inspiration, explore Kids Room Ideas That Make Every Space Feel Magical and create a playful Halloween display at home. This project encourages storytelling as children invent who lives inside their haunted houses and what adventures happen there.
6. Paper Spider Webs
Paper spider webs are a fun Halloween project that teaches children how folding and cutting can create interesting patterns. You will need white paper, child-safe scissors, a pencil, and black construction paper for the background.

Fold the white paper several times, then carefully cut small triangles and curved shapes along the folded edges. Unfold the paper slowly to reveal the web pattern. Younger children can use a simpler template prepared by an adult.
Glue the finished web onto black paper to make its delicate pattern stand out. Add a small paper spider with eight legs for an extra spooky touch. Children can experiment with different cutting patterns to create unique webs for windows, doors, or bedroom walls.
For more creative inspiration, explore 41 Paper Crafts Kids Never Get Bored Of and discover other projects that encourage experimentation. Always supervise younger children when using scissors, and remind them to cut slowly rather than rushing to finish.
7. Paper Frankenstein Monsters
Frankenstein monsters are excellent for children who enjoy funny faces and colorful characters. Gather green, black, and white construction paper, glue, scissors, and markers. Cut a large green rectangle for the monster’s head, then add black paper hair across the top.
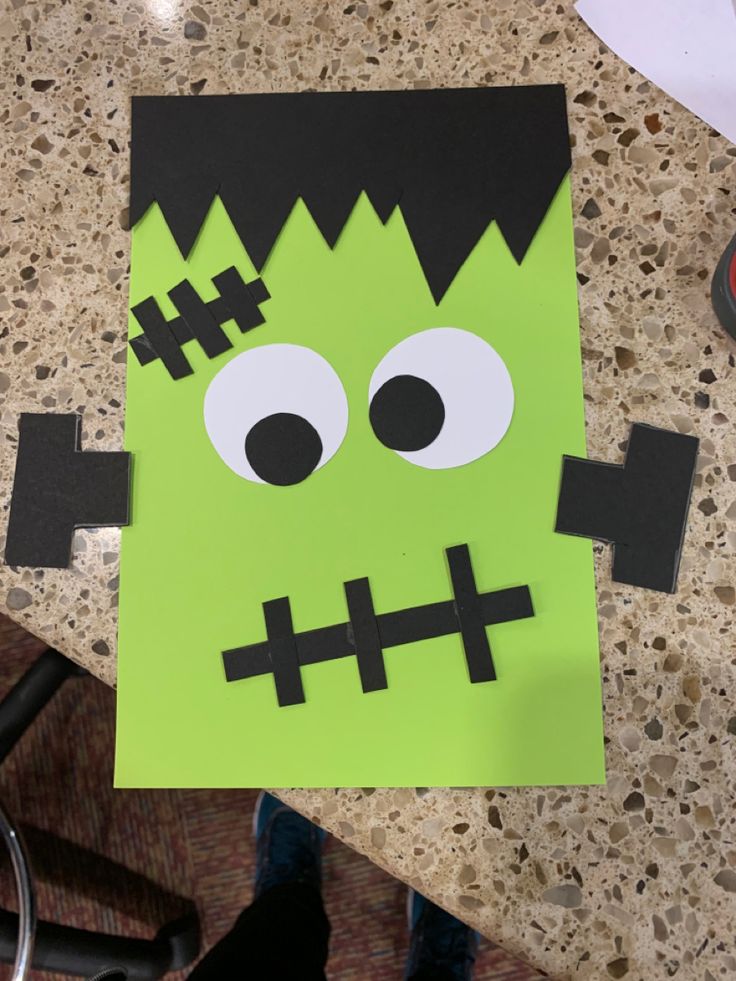
Create two white eyes, a small black nose, and a stitched mouth using narrow strips of black paper. Add small rectangles on the sides to represent bolts.
Encourage your children to experiment with different expressions. One monster might look surprised, while another could have a cheerful smile or crooked eyebrows. They can also add paper bow ties, colorful hair, or funny accessories to make each character unique.
Display the finished monsters on a wall or use them to decorate handmade Halloween cards. If your children enjoy seasonal artwork, explore 31 Halloween Painting Ideas Kids Will Love Making for another creative activity. This simple craft combines shape recognition, cutting practice, and imaginative design.
8. Paper Black Cats
Black cats make charming Halloween decorations, especially when children give them oversized eyes and playful expressions. For this project, gather black, yellow, and pink construction paper, glue, scissors, and markers.
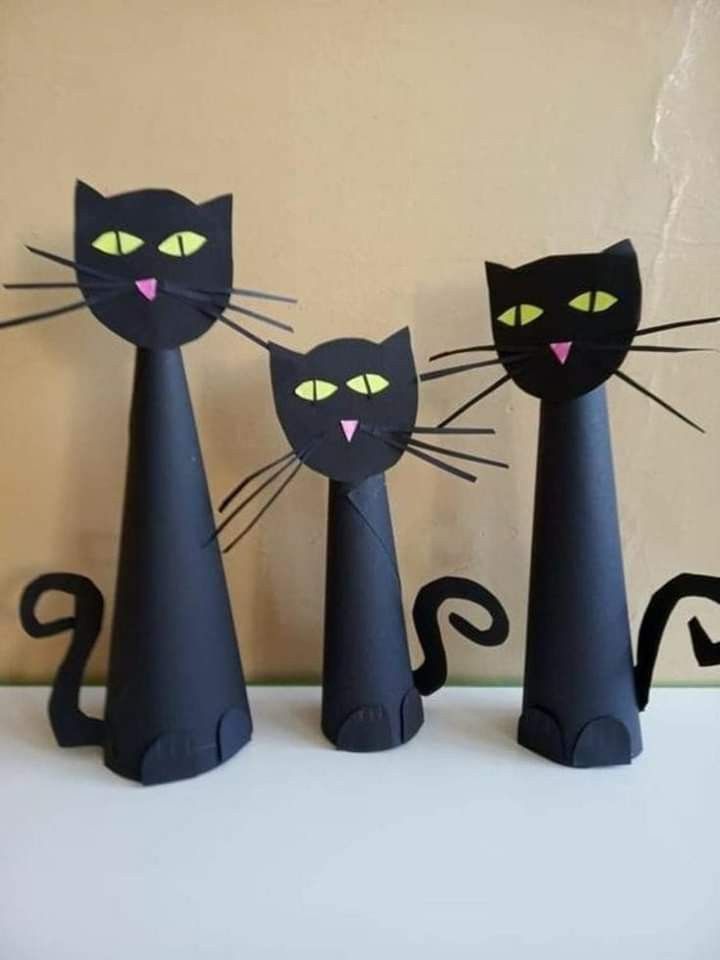
Cut a large circle or oval for the cat’s head, then add two triangular ears. Create yellow eyes, a small pink nose, and thin paper strips for whiskers. Older children can also cut out a curved tail and a simple body.
Help your child assemble the pieces on a contrasting sheet of paper. Purple, orange, or white backgrounds make black cats stand out beautifully. Encourage children to add bows, collars, or tiny paper pumpkins for extra personality. You can display the finished cats individually or arrange several into a playful Halloween scene.
For more seasonal crafting ideas, discover 15 Easy Halloween Crafts for Kids That Are More Fun. Let children choose their cats’ expressions and accessories so each creation reflects their imagination.
9. Paper Ghost Garland
A paper ghost garland can brighten a bedroom, classroom, or family party without requiring expensive decorations. You will need white construction paper, pencils, scissors, markers, and string or tape. Draw several simple ghost shapes on folded paper, leaving small sections connected if you want a paper chain.
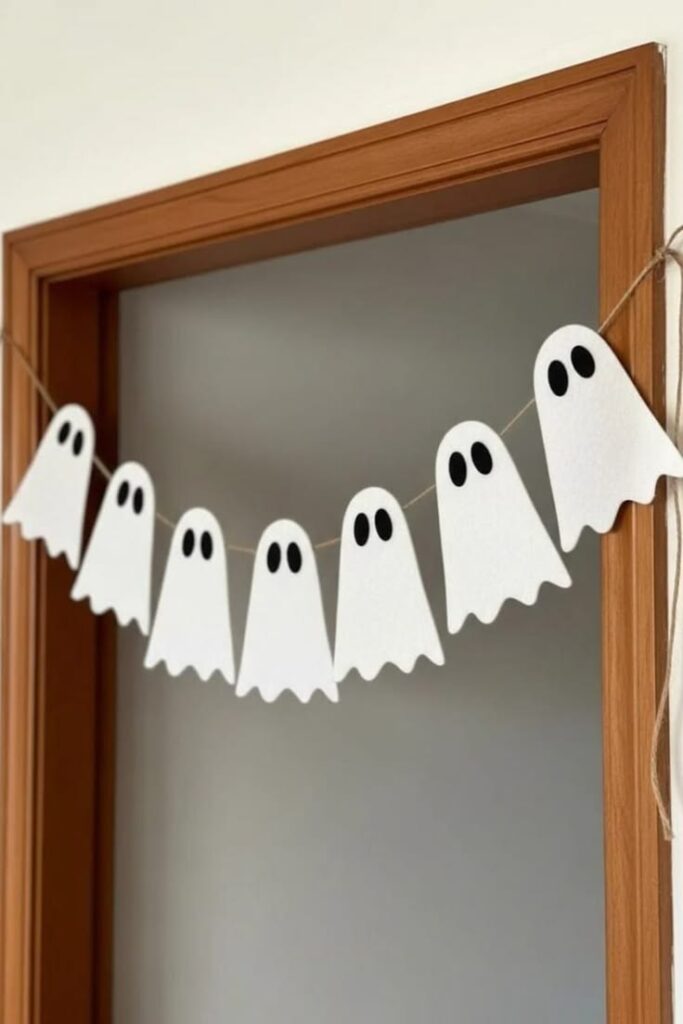
Carefully cut around the outlines, then unfold the shapes to reveal a row of connected ghosts. Alternatively, make individual ghosts and attach them to a length of string.
Let your children draw different faces on each ghost. Some can look sleepy, while others can appear excited or surprised. Add orange paper stars or small black bats between the ghosts to create a colorful display.
For a complete seasonal decorating project, explore 25 Halloween Decorating Ideas for Families Who Want a Cozy, Not Scary Home. Hang the garland where it will not obstruct walkways or create a strangulation hazard for young children. This craft is especially useful when you need several decorations for a Halloween party.
10. Paper Candy Corn Bookmarks
Candy corn bookmarks are a sweet little craft for children who enjoy reading and seasonal decorations. You will need white, yellow, and orange paper, scissors, glue, and markers. Cut out a long triangle or create a simple folded corner bookmark from paper.

Divide the front into three sections, then color or attach white, orange, and yellow paper pieces to resemble candy corn. Make sure the layers lie flat so the bookmark fits comfortably between book pages.
Children can personalize their bookmarks with smiling faces, tiny paper stars, or funny Halloween expressions. These creations also make thoughtful handmade gifts for classmates, cousins, and teachers. Encourage your child to use the bookmark during storytime or while reading Halloween picture books together.
You can find more family-friendly inspiration in How to Create a Screen-Free Routine Your Kids Will Actually Enjoy. Combining a short crafting session with reading helps children enjoy a creative activity while building a positive relationship with books.
11. Paper Skeleton Puppets
Paper skeleton puppets are exciting for children who enjoy crafts they can move and play with afterward. You will need white cardstock, black paper, scissors, markers, and paper fasteners. Draw or print simple shapes for the skeleton’s head, body, arms, and legs.
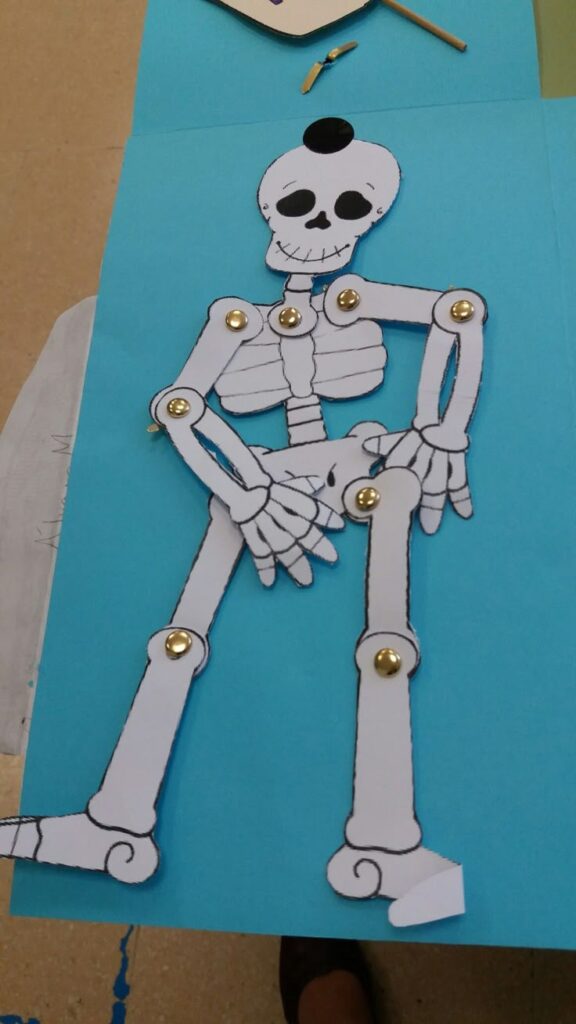
Cut out each piece, then arrange the body parts against the black background. An adult can help attach the joints using paper fasteners so the arms and legs move freely.
Encourage your child to decorate the skeleton with a funny face or a colorful bow tie. Once assembled, children can move the limbs to create silly dancing poses and invent spooky stories. Keep small fasteners away from toddlers who might swallow them.
For more creative activities, explore 25 Fine Motor Activities for Toddlers That Build Hand Strength Through Play and discover ideas suited to developing little hands. This project combines crafting with imaginative play, making it especially enjoyable for children who love interactive toys.
12. Paper Witch Broomsticks
Mini paper broomsticks are easy to make and look adorable beside paper witches or haunted houses. Gather brown construction paper, yellow or black paper, scissors, and glue.

Cut a rectangular strip of brown paper, then make several narrow cuts along one edge. Leave a solid section at the top so the strips remain connected. Roll the uncut section around a narrow paper handle and secure it with glue.
Children can gently separate the paper strips to create a fluffy broom effect. Add a tiny paper ribbon around the handle or decorate it with colorful stars. These broomsticks work beautifully as props for handmade Halloween scenes and greeting cards.
If your children enjoy combining several crafts into one display, explore 21 Easy Crafts Kids Can Make at Home21 Easy Crafts Kids Can Make at Home for more accessible project ideas. Keep the finished broomsticks lightweight, and allow glue to dry before displaying them. Encourage children to experiment with different paper colors to create a whole collection of magical accessories.
13. Paper Monster Masks
Paper monster masks let children invent their own Halloween characters and bring them to life through pretend play. You will need cardstock, colored paper, crayons, glue, scissors, and string or a craft stick. Cut a mask shape with eye openings, ensuring an adult handles any tricky cutting.
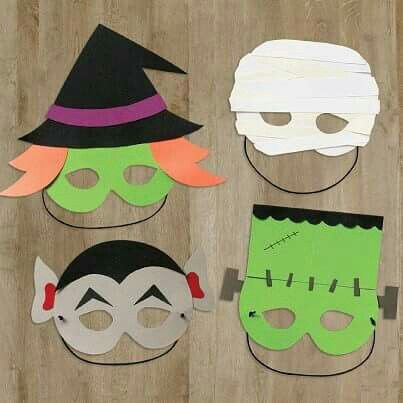
Then provide colorful paper scraps for horns, ears, teeth, eyebrows, and other features. Children can create friendly monsters, silly creatures, or imaginative characters with several eyes.
Once the decorations dry, attach a craft stick to the bottom for a handheld mask. Alternatively, an adult can help fit a suitable elastic strap securely, ensuring it never restricts breathing or vision. Encourage children to name their characters and invent short stories about them.
For additional seasonal fun, explore 50 Easy Kids Activities at Home That Keep Little Ones Busy. This activity supports creativity while giving children a playful way to enjoy Halloween without needing expensive costumes.
14. Paper Coffin Treat Boxes
Paper coffin boxes add a spooky touch to Halloween party tables and make cute containers for wrapped treats. You will need black cardstock, a pencil, a ruler, scissors, glue, and colored paper for decorations. Draw a simple coffin template with straight sides and angled corners.
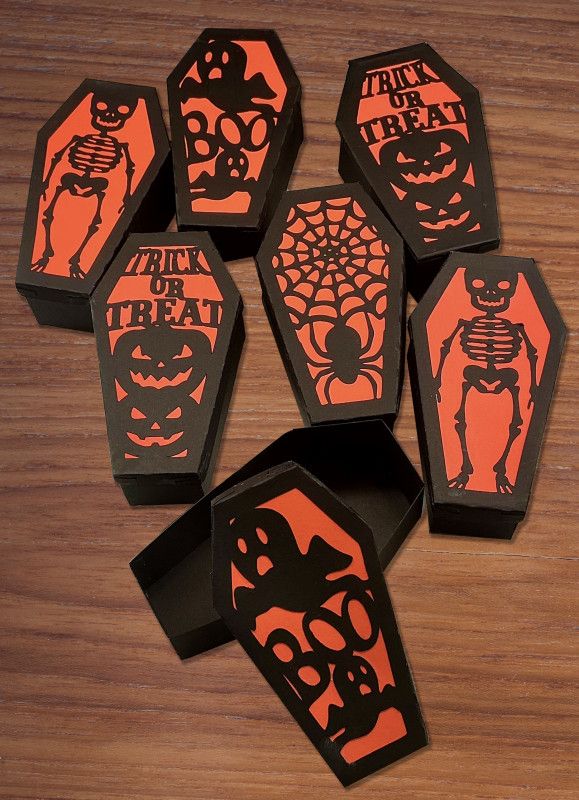
Add narrow tabs along the edges so you can fold and glue the shape into a shallow box. An adult should help with precise cutting and folding, especially for younger children.
Decorate the lid with orange stars, purple stripes, or a small paper bat. Once the box is dry, use it to hold wrapped sweets, stickers, or small party favors that suit the recipient’s age. Avoid putting food directly against craft materials unless they are suitable for food contact.
If you are planning a Halloween gathering, explore 21 Pumpkin Decorating Party Ideas Kids and Adults Will Both Love for more festive activities. This project encourages careful measuring and folding while creating a useful decoration for your celebration.
15. Paper Lanterns With Halloween Faces
Paper lanterns create a festive atmosphere and are simple enough for many school-age children to make. Gather orange, black, or purple paper, scissors, glue, and markers.

Fold a rectangular sheet in half lengthwise, then cut parallel lines from the folded edge toward the opposite edge. Stop before reaching the end so the paper remains connected. Open the sheet, roll it into a cylinder, and secure the edges together.
Add a paper handle and decorate the lantern with pumpkin faces, ghosts, or tiny bats. Younger children can draw the faces instead of cutting out complicated shapes. Display the lanterns on a table or hang them where they cannot obstruct movement. Never place real candles or hot bulbs inside paper lanterns.
If you want a glowing effect, use a suitable battery-operated light under adult supervision. For more seasonal decorating inspiration, discover 27 Simple Fall Home Decor Ideas That Make Your Home Feel Cozy. These colorful lanterns can brighten your Halloween display without requiring complicated supplies.
16. Paper Vampire Bats With Folded Wings
These folded-wing bats look extra spooky because their wings pop out from the paper. You will need black construction paper, red and white paper scraps, glue, scissors, and markers. Cut an oval for the bat’s body and two simple wings. Fold each wing back and forth like an accordion to create a raised effect. Attach the wings to the body, then add white eyes and tiny red or white fangs.

Help your child make several bats with different wing shapes and facial expressions. Arrange them across a large sheet of paper to create a Halloween night scene. You can also attach them to a homemade haunted house display.
For more creative inspiration, explore 33 Creative Minecraft Paper Craft Templates for Kids and Beginners if your child enjoys building characters from paper. Encourage experimentation with folding patterns, but keep the cutting simple for younger children. These dimensional bats add variety to ordinary flat paper decorations.
17. Paper Pumpkin Garland
A paper pumpkin garland is a cheerful way to decorate your home for Halloween without buying expensive seasonal accessories. Gather orange construction paper, green paper, string, scissors, glue, and markers. Cut several pumpkin shapes from orange paper, making them roughly the same size.

Add small green stems, then draw or glue on different expressions. Older children can create pumpkins with stripes, spots, or funny eyebrows to make each one unique.
Once the pumpkins are ready, attach them to a string using tape or glue. Leave enough space between each shape so the faces remain visible. Hang the finished garland above a craft table or on a suitable wall away from walkways.
You can also pair this project with 31 Easy Fall Table Decor Ideas for Family Gatherings for a coordinated seasonal display. Invite everyone in the family to contribute a pumpkin. This shared activity creates decorations while giving children a chance to express their individual creativity.
18. Paper Monster Corner Bookmarks
Monster corner bookmarks are practical little crafts that make reading more exciting. You will need square sheets of colored paper, smaller paper scraps, glue, scissors, and markers. Fold the square into a simple corner bookmark shape, leaving a pocket that fits over a book page.

Add eyes, sharp paper teeth, horns, or funny eyebrows to transform the bookmark into a friendly monster. Children can make different characters using green, purple, orange, and blue paper.
Encourage your child to create a bookmark for a favorite book or give one to a friend. Keep the decorations flat enough to avoid damaging the pages. Younger children may need help with the folding steps, but they can choose colors and add facial features independently.
For more reading-friendly family ideas, explore How to Start Meaningful Family Traditions Your Kids Will Remember. You could even make bookmark crafting part of your annual Halloween preparations. This project combines creativity, fine motor practice, and a useful item your child can enjoy long after Halloween.
19. Paper Spider Decorations With Accordion Legs
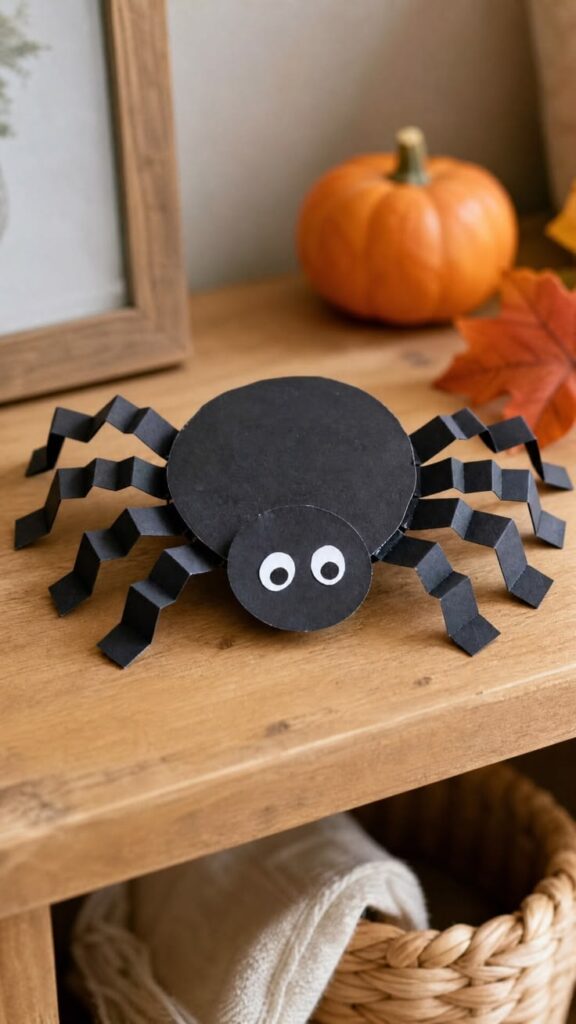
Paper spiders with accordion-folded legs look playful and three-dimensional. To make one, gather black construction paper, scissors, glue, and white paper for the eyes. Cut a circle for the spider’s body and eight long paper strips for its legs.

Fold each strip back and forth like an accordion, then glue four legs to each side of the body. Add two large eyes and a cheerful mouth to make your spider look friendly rather than frightening.
Children can experiment with different body sizes and leg lengths. Some spiders might have colorful spots, while others could wear tiny paper hats. Place the finished spiders on a craft display or attach them to a paper spider web.
For more creative activities, explore 27 Sensory Bin Ideas That Keep Toddlers Busy Longer to discover additional ways to make seasonal play engaging. Supervise younger children during cutting and keep small decorations away from children who may swallow them. This project is an excellent way to combine folding, gluing, and imaginative design.
20. Paper Halloween Greeting Cards
Homemade Halloween cards give children a thoughtful way to share seasonal fun with friends, relatives, and teachers. You will need folded cardstock, colored paper, glue, markers, and child-safe scissors. Begin by folding a sheet of cardstock in half to create the card.
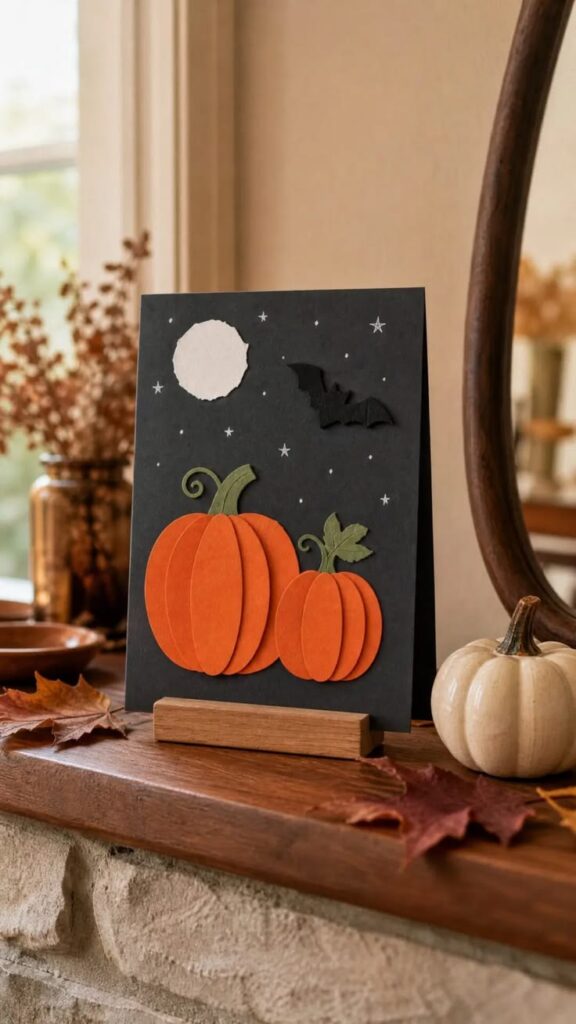
Let your child choose a theme, such as a smiling ghost, a paper pumpkin, or a black cat. Cut out simple shapes and arrange them on the front before gluing them into place.
Inside the card, children can write a Halloween greeting, draw a picture, or add a small personal message. Younger kids can dictate their message while an adult writes it down. Encourage creativity rather than perfect spelling or neatness.
For another family-friendly activity, explore How to Make Birthdays Feel Special Without Spending Too Much for ideas about meaningful homemade celebrations. These cards are inexpensive, personal, and easy to customize. Making several together can also become a fun afternoon tradition that children look forward to every October.
21. Paper Mummy Wrap Craft
Paper mummies are a simple Halloween project that younger children can enjoy without complicated instructions. Gather black construction paper, white paper strips, glue, scissors, and googly eyes or small paper circles. Cut a mummy-shaped body from black paper, then help your child glue white strips across it.
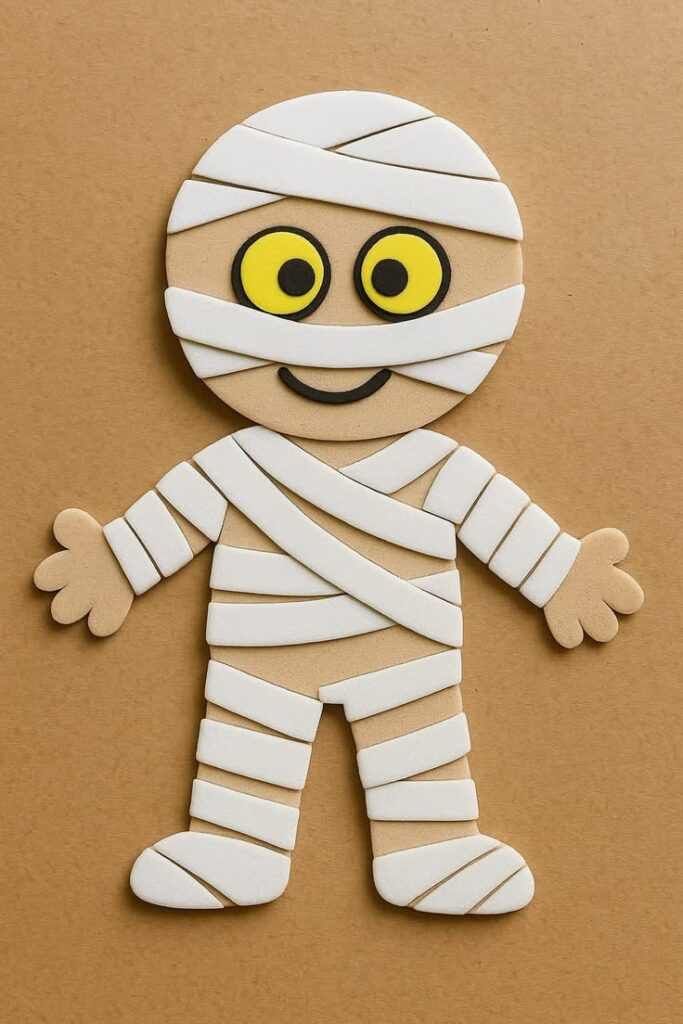
Encourage them to overlap the strips in different directions to create a wrapped appearance. Leave a small gap near the top for the eyes, then add a funny expression.
Children can make their mummies look sleepy, surprised, or cheerful. They can also add tiny paper arms and legs for extra personality. Display the finished mummies alongside your paper ghosts and bats for a coordinated Halloween scene.
If your family enjoys seasonal activities, explore 21 Fall Activities for Families to Enjoy Together at Home for more ways to make the season memorable. Use child-safe materials and supervise younger children during cutting. This easy project offers plenty of room for creativity without requiring expensive supplies.
22. Paper Witch Face Collage
A witch face collage lets children experiment with colors, shapes, and funny facial features. You will need green, purple, orange, black, and white construction paper, glue, scissors, and markers.
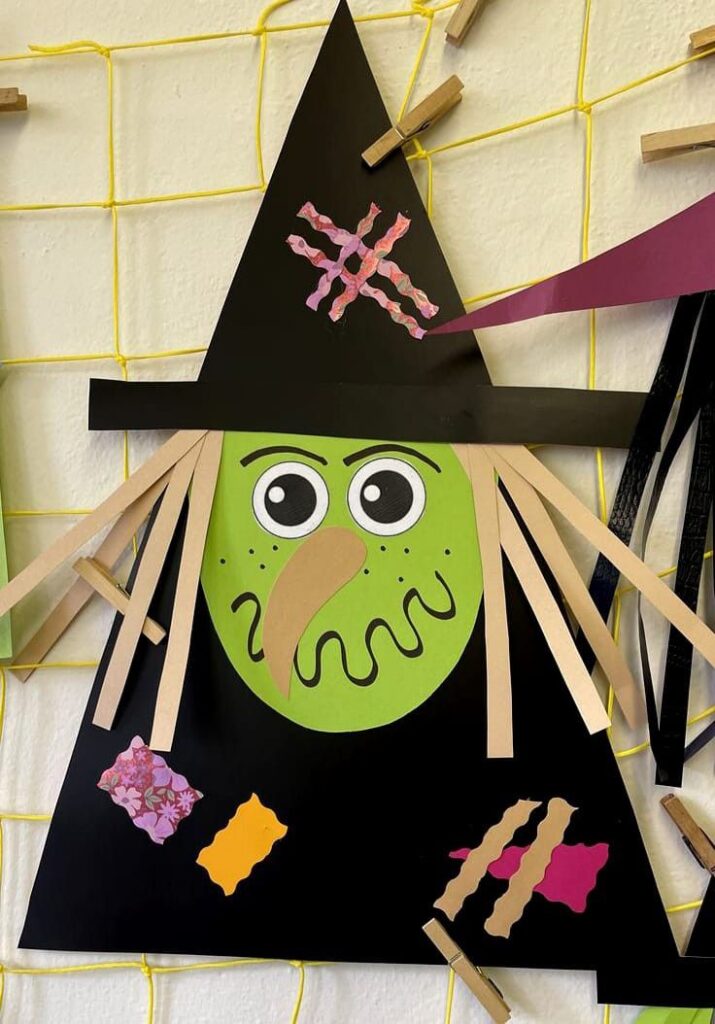
Start by cutting a large face shape from green paper. Add a pointed purple hat, orange paper hair, and simple facial features. Children can create large eyes, a crooked nose, rosy cheeks, or a wide smile to give their witch a unique personality.
Encourage your child to arrange the pieces before gluing them down. This allows them to experiment with different expressions and hairstyles without wasting materials. Older children can add a paper spider, stars, or a tiny hat buckle. You can also turn the finished collage into a Halloween greeting card or wall decoration.
For more creative inspiration, explore 21 Fun Painting Ideas for Kids That Spark Creativity and combine paper collage with simple painting activities. Let children enjoy the process rather than aiming for a perfect-looking witch.
23. Paper Candy Basket
A paper candy basket is a practical craft that children can use to hold wrapped sweets, stickers, or small party favors. Gather sturdy construction paper or cardstock, scissors, glue, a ruler, and markers. Cut a rectangular strip for the basket’s body and fold it into a small box shape.
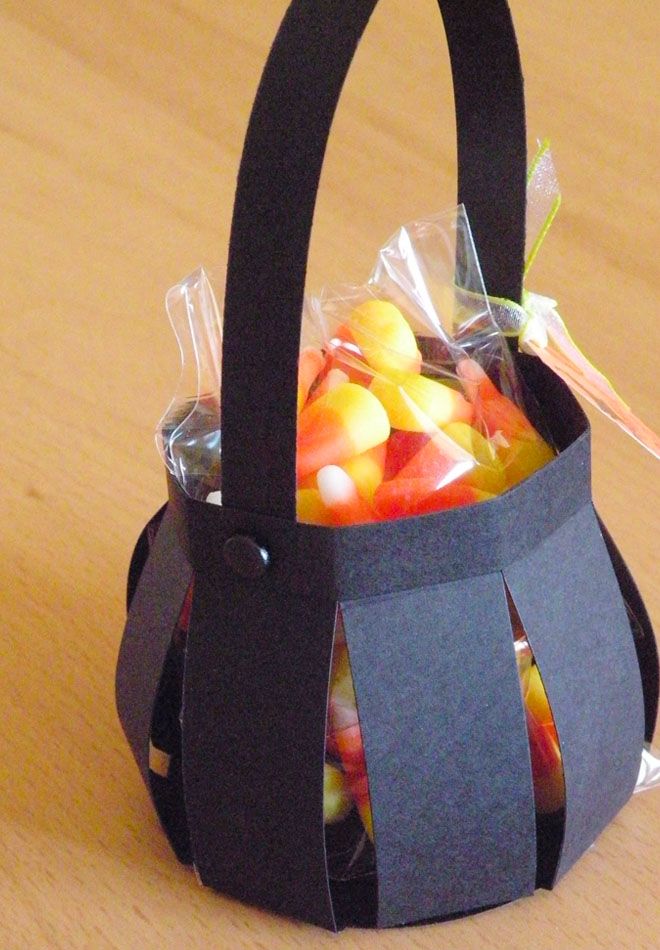
Attach a paper handle across the top, then decorate the outside with pumpkins, ghosts, bats, or colorful Halloween patterns. An adult can help with measuring and securing the corners.
Choose sturdy paper so the basket holds lightweight treats without falling apart. Children can personalize their baskets with names, funny faces, or their favorite Halloween colors. Keep food wrapped and use clean materials when preparing containers for treats.
For additional seasonal ideas, explore 25 Whimsical Fall Birthday Themes For Kids That Feel Magical and Easy to Plan for inspiration when organizing a festive gathering. This craft can also become part of a classroom party activity. Children will enjoy carrying their handmade baskets and showing off their creative designs.
24. Paper Moon and Stars Halloween Scene
A paper moon and stars scene gives children an opportunity to create a magical Halloween night sky. You will need black or dark blue construction paper, yellow paper, scissors, glue, and markers.
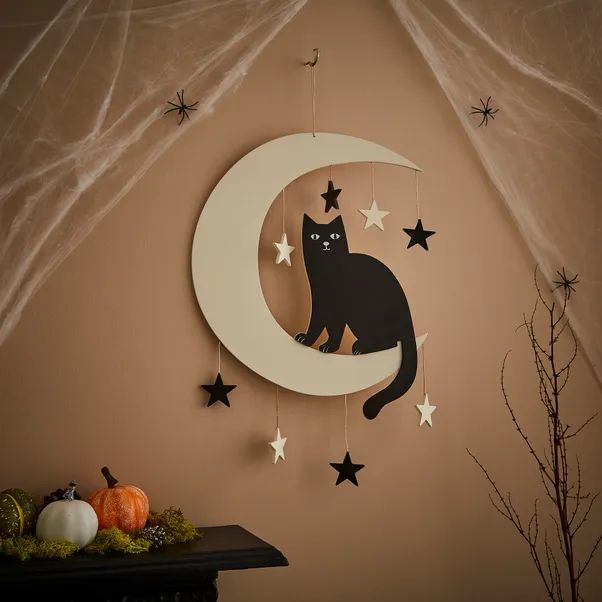
Cut out a large crescent moon and several stars, then arrange them against the dark background. Children can add paper bats, flying witches, tiny ghosts, or a haunted house beneath the moon. This project works especially well as a collaborative family craft.
Invite your child to invent a story about the scene. Perhaps a friendly ghost is visiting a pumpkin patch, or bats are flying toward a mysterious castle. Older children can add details using smaller paper shapes, while younger children can focus on larger cutouts and simple arrangements.
Display the artwork on a bedroom wall or use it as a seasonal centerpiece. For more inspiration, explore 31 Cozy Bedroom Decor Ideas for Busy Moms Who Need a Calmer Space and create a coordinated seasonal display. Keep the activity relaxed and allow every child to choose their favorite colors and characters.
25. Paper Monster Paper Chains
Monster paper chains turn ordinary paper strips into a colorful Halloween decoration. Gather construction paper in several colors, scissors, glue or tape, and markers. Cut the paper into equal strips, then form each strip into a loop and connect it to the next.
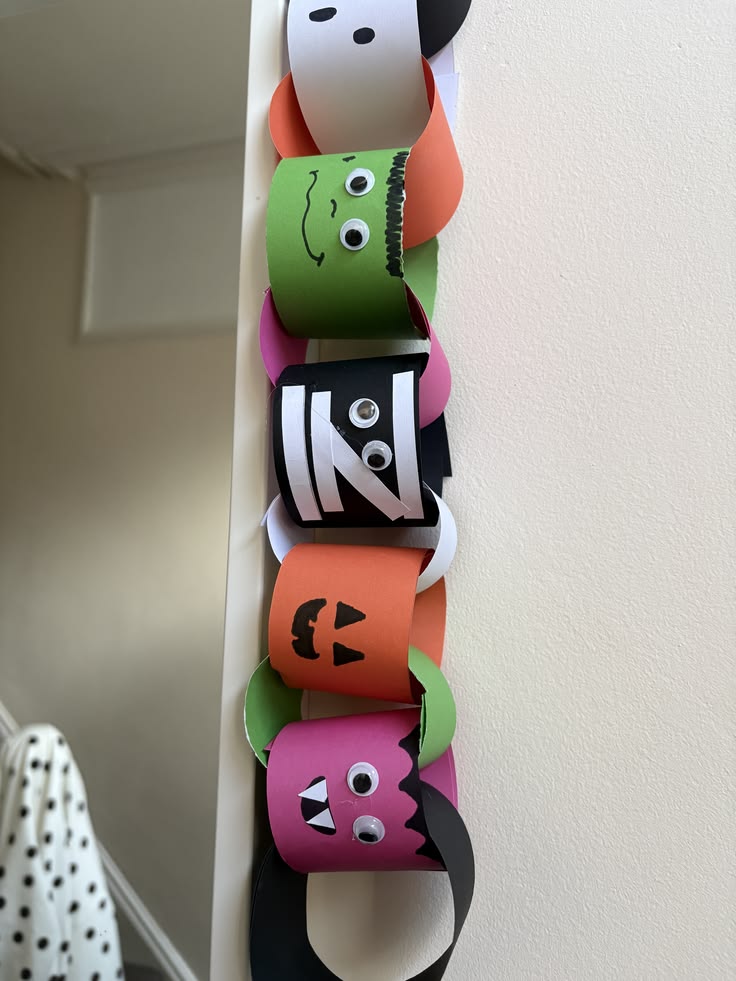
Before joining the loops, decorate some strips with monster faces, eyes, teeth, or funny expressions. You can also alternate plain colored loops with decorated monster loops for a playful effect.
Help your child choose a color pattern or create a completely random chain. Longer chains can decorate a doorway or party table, while shorter versions work well on bedroom walls. Make sure the finished decoration hangs securely and stays away from candles, heaters, and other heat sources.
For more craft inspiration, explore 25 Popsicle Stick Crafts Kids Can Actually Make for another collection of affordable projects. Paper chains are particularly useful when you need decorations for a group activity because children can each contribute several loops.
26. Paper Coffin and Skeleton Scene
A paper coffin and skeleton scene combines several simple shapes into one exciting Halloween artwork. Gather black, white, purple, and orange paper, along with glue, scissors, and markers. Cut a coffin shape from black paper and create a skeleton using white strips and small rectangles.
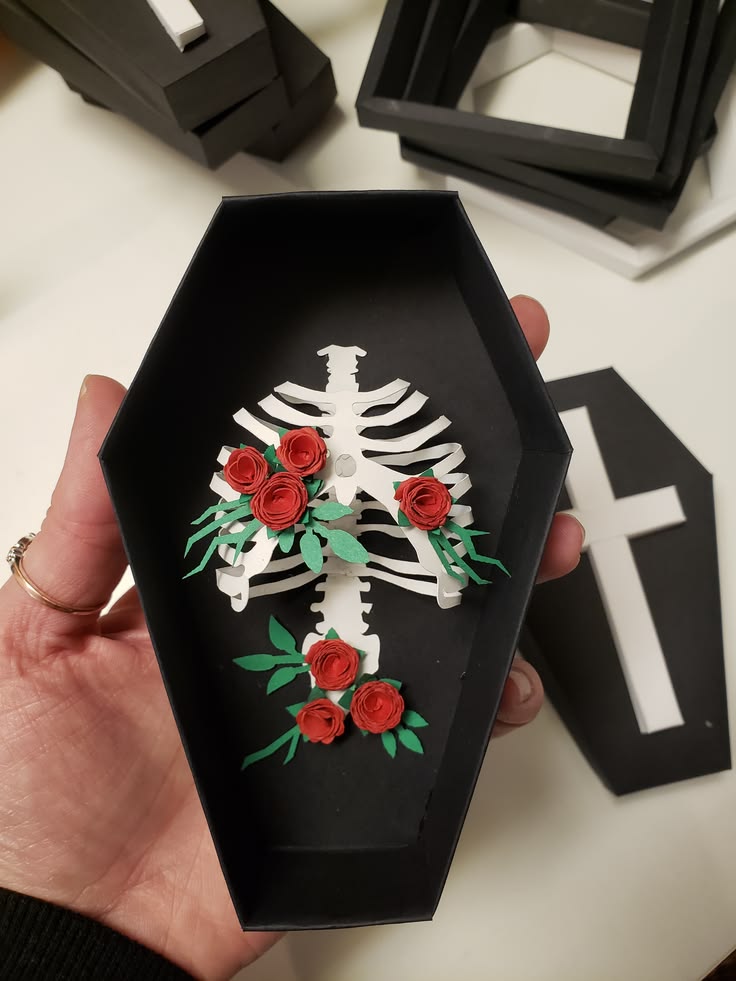
Arrange the skeleton inside the coffin or beside it, then add a paper moon, bats, or tiny pumpkins to complete the scene. Younger children can use larger pre-cut shapes, while older kids can build more detailed skeletons.
Encourage your child to create a spooky story about the scene. Perhaps the skeleton is a friendly character preparing for a Halloween party rather than a frightening figure. Display the finished artwork alongside your other paper decorations to create a complete Halloween gallery.
For more seasonal inspiration, discover 27 Easy Toilet Paper Roll Crafts for Kids They’ll Actually Love and find ways to reuse everyday materials. Keep scissors and small craft pieces supervised according to your child’s age. This project brings together cutting, arranging, storytelling, and creative expression.
27. Paper Halloween Party Hats
Paper Halloween party hats are a cheerful way to finish your collection of homemade decorations. You will need construction paper, scissors, glue, markers, and lightweight decorations such as paper stars or bat shapes.

Roll a sheet of paper into a cone, then secure the overlapping edge with tape or glue. Trim the bottom so the hat sits evenly, and decorate it with Halloween characters, stripes, or colorful shapes. An adult can help adjust the size for a comfortable fit.
Let your children design their own hats using their favorite colors and characters. One child might create a pumpkin hat, while another chooses a ghost or monster theme. Allow the glue to dry completely before wearing the hats, and avoid tight elastic or decorations that could obstruct vision.
If you are planning a family celebration, explore 31 Family Fun Night Ideas for Staying Home Together for activities that complement your homemade party accessories. These simple hats help children feel involved in preparing for Halloween and make lovely additions to photographs and pretend-play games.
Final Thoughts
Halloween is a wonderful opportunity to help children explore their creativity while making special memories at home. These 27 Halloween Paper Crafts Kids Can Make at Home offer plenty of ways to turn ordinary paper into spooky ghosts, playful bats, colorful pumpkins, and imaginative decorations.
You do not need expensive supplies or advanced crafting skills to get started. A few sheets of construction paper, some glue, and child-safe scissors can provide hours of creative fun for the whole family.
Remember to choose projects that suit your children’s ages and abilities. Prepare materials beforehand, supervise cutting when necessary, and allow little ones to express their personalities through their creations.
If you want more inspiration, explore 31 Family Fun Night Ideas for Staying Home Together for activities that make family time enjoyable. You can also discover How to Start Meaningful Family Traditions Your Kids Will Remember for ideas that turn simple moments into lasting memories.
Most importantly, focus on having fun rather than creating perfect decorations. Display your children’s artwork around the house, share their creations with loved ones, and celebrate their imagination.
You might even make Halloween crafting an annual family tradition that everyone eagerly anticipates. Gather your paper supplies, choose your favorite project, and let your little artists bring their spooky ideas to life.